
Understanding Integration Testing in React

Do you sometimes worry that your tests don't make sense? Struggling to get what people mean by "test from the user's perspective" and the classic piece of advice "test functionality, not implementation details"?
You're not alone!
I felt the same thing when I moved from Enzyme to React Testing Library. I used to think of testing as just checks you had to do on individual components, directly asserting against props and state, and would struggle to think about how to test the integration of several components together.
What does "integration test" even mean?
It helps to think of integration testing like a bigger unit test, except the unit you're testing is the combination of several smaller components.
More concretely, instead of just testing a Button component, or a TextField component in isolation, we're going to test that they work when placed together into a form.
Let's get started!
We're going to be testing a form almost every public web app you're going to build has: a Login form. It's probably one of the most important parts of your app (in terms of business value), so let's be confident it actually works!
Setup
We're going to be using create-react-app, because it comes bundled with @testing-library/react. I'm also using react-hook-form to build our form, because it's the quickest way I could think of to display the form data in our web app.
You can either:
- Clone the repo
- Follow the steps below to set this up manually (you'll still need to download the repo)
Manual steps
-
Run:
npx create-react-app <YOUR_APP_NAME> -
Run:
cd <YOUR_APP_NAME> -
[Only for react-hook-form] Run:
yarn add react-hook-form mutationobserver-shim # OR npm install react-hook-form mutationobserver-shim -
[Only for react-hook-form] In
src/setupTests.js, in a new line, addimport 'mutationobserver-shim'; -
Copy the
src/directory from the repo into yoursrc/directory, overriding existing files -
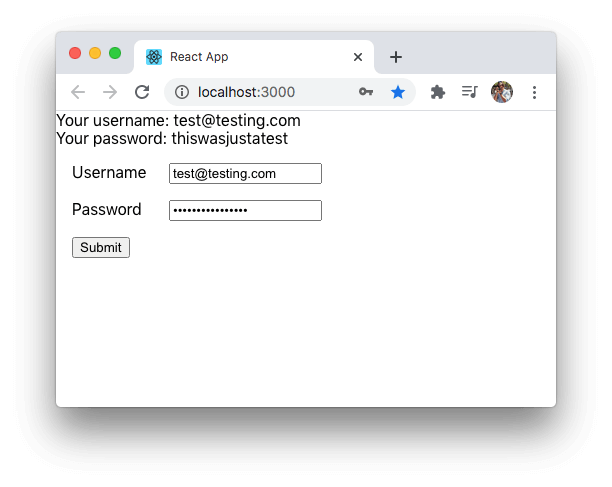
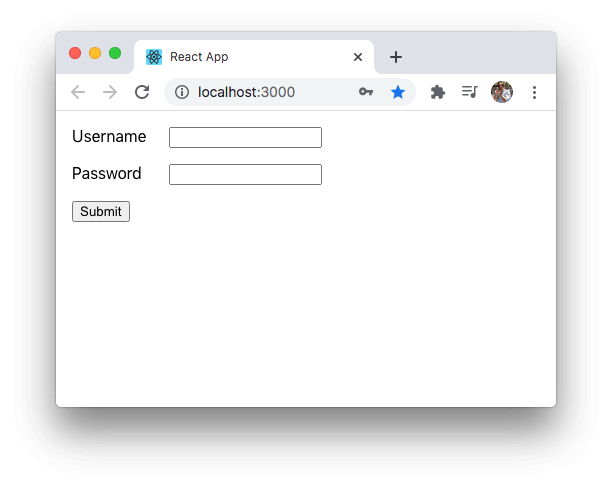
Run:
yarn startYou should see something like this:
-
At this point, if you ran
yarn test, you would see the following:
 PASS  src/pages/Login.test.js
  ✓ renders all inputs (75ms)
  ✓ integration test (110ms)

Test Suites: 1 passed, 1 total
Tests:       2 passed, 2 total
Snapshots:   0 total
Time:        3.883s
Ran all test suites.

Watch Usage: Press w to show more.
So how do we get here?
Let's start off with a render test:
import React from 'react';
import { render } from '@testing-library/react';
import Login from './Login';

test('renders all inputs', () => {
  const { getByLabelText } = render(<Login />);

  // here we're using regex so that updating the
  // component to UPPER CASE won't fail the test
  const userInput = getByLabelText(/username/i);
  expect(userInput).toBeInTheDocument();

  const passwordInput = getByLabelText(/password/i);
  expect(passwordInput).toBeInTheDocument();
});
It's not the most complicated test out there, and it's already giving us benefits beyond what a unit test would give. It's also technically an integration test.
In particular, we're saying "on my login form, I want a username input to be visible at the same time as the password input".
Now let's test the happy path of our login form:
import React from 'react';
import { render, fireEvent } from '@testing-library/react';
import user from '@testing-library/user-event';
import Login from './Login';

test('integration test', async () => {
  const USER = 'some-username';
  const PASS = 'some-pass';

  const { getByLabelText, findByText, getByText } = render(<Login />);

  const userInput = getByLabelText(/username/i);
  user.type(userInput, USER);

  const passwordInput = getByLabelText(/password/i);
  user.type(passwordInput, PASS);

  const submitButton = getByText(/submit/i);
  fireEvent.click(submitButton);
  expect(await findByText(/your username/i)).toBeInTheDocument();
  expect(await findByText(/your password/i)).toBeInTheDocument();
});
This integration test builds on top of our initial test in a few ways:
- We've imported the
'@testing-library/user-event'library to allow us to type into our inputs - We've imported
fireEventfrom the'@testing-library/react'library to allow us to click on ourButtoncomponent - We've marked the test
asyncto enable us to usefindByText()- findByText is neat because it returns a Promise, letting us wait until it finds the text it's looking for before continuing
- Most importantly, we've built a test that can type into our
TextFieldcomponents, click on ourButtoncomponent, and trigger theFormcomponent'sonSubmitfunction!
If you're confused about findByText vs getByText, don't worry - that's normal. React Testing Library's cheatsheet has tips to help you decide which one to use.
Conclusion
You've just started to understand integration testing, but you best believe there's a lot more to it than this article!
If you want a more advanced perspective of integration testing your forms, I highly recommend reading the testing section of React Hook Form's Advanced Usage guide.
(Shameless plug for the useEffect book I wrote below)
Tired of infinite re-renders when using useEffect?
A few years ago when I worked at Atlassian, a useEffect bug I wrote took down part of Jira for roughly one hour.
Knowing thousands of customers can't work because of a bug you wrote is a terrible feeling. To save others from making the same mistakes, I wrote a single resource that answers all of your questions about useEffect, after teaching it here on my blog for the last couple of years. It's packed with examples to get you confident writing and refactoring your useEffect code.
In a single afternoon, you'll learn how to fetch data with useEffect, how to use the dependency array, even how to prevent infinite re-renders with useCallback.
